
Once you have installed a new template you may want to create some additional pages in your solution.
In our previous example of CRM, we’ll need to create multiple pages to build the solution. The pages will be used to add new leads, display lead details, build a dashboard etc.
This guide will walk you through the process of adding and configuring new pages for your solution. Pages play a crucial role in customizing your application's functionality and user interface.
Lets see how to create a new page.
Accessing Page Creation
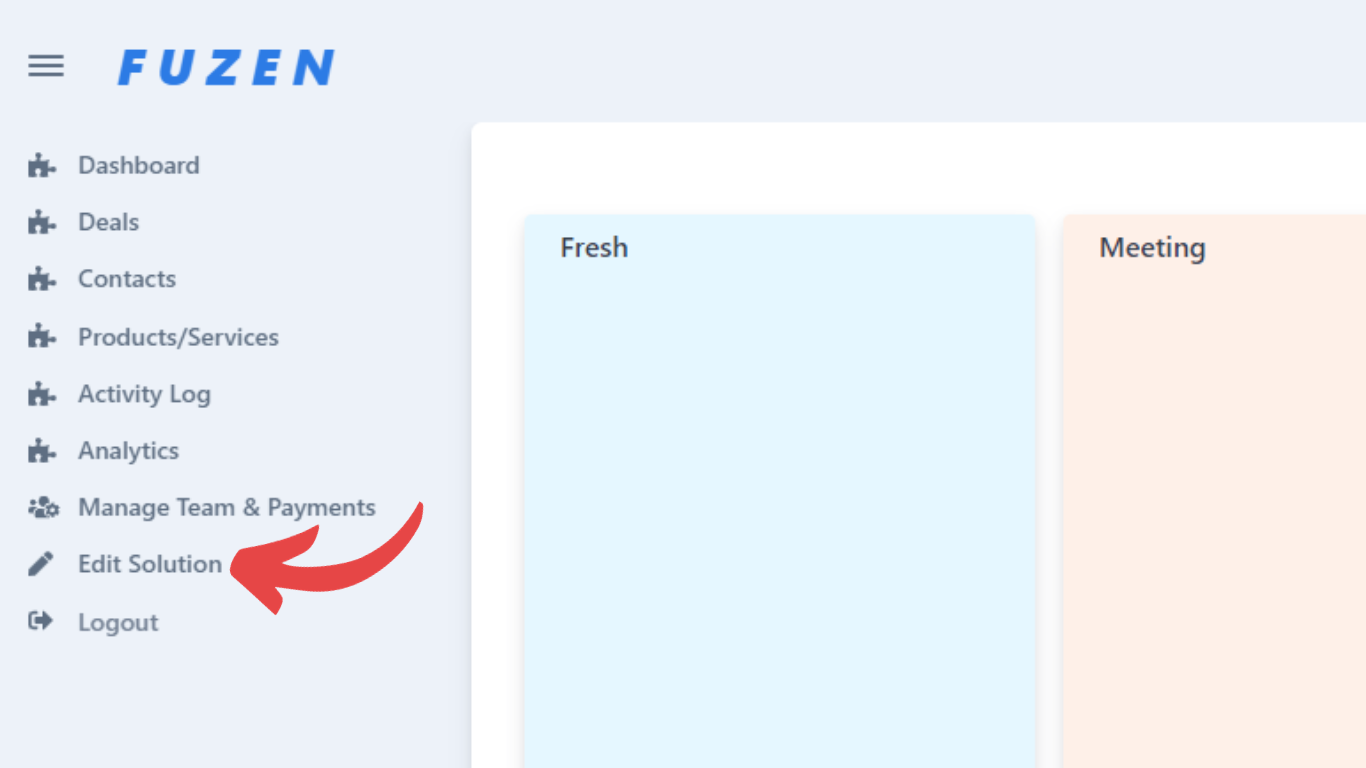
The Page settings can easily be accessed from the Edit Solution page.
For this first, log in to your Fuzen account and select the desired app from your dashboard.
Click on the "Edit Solution" option located in the app management menu.
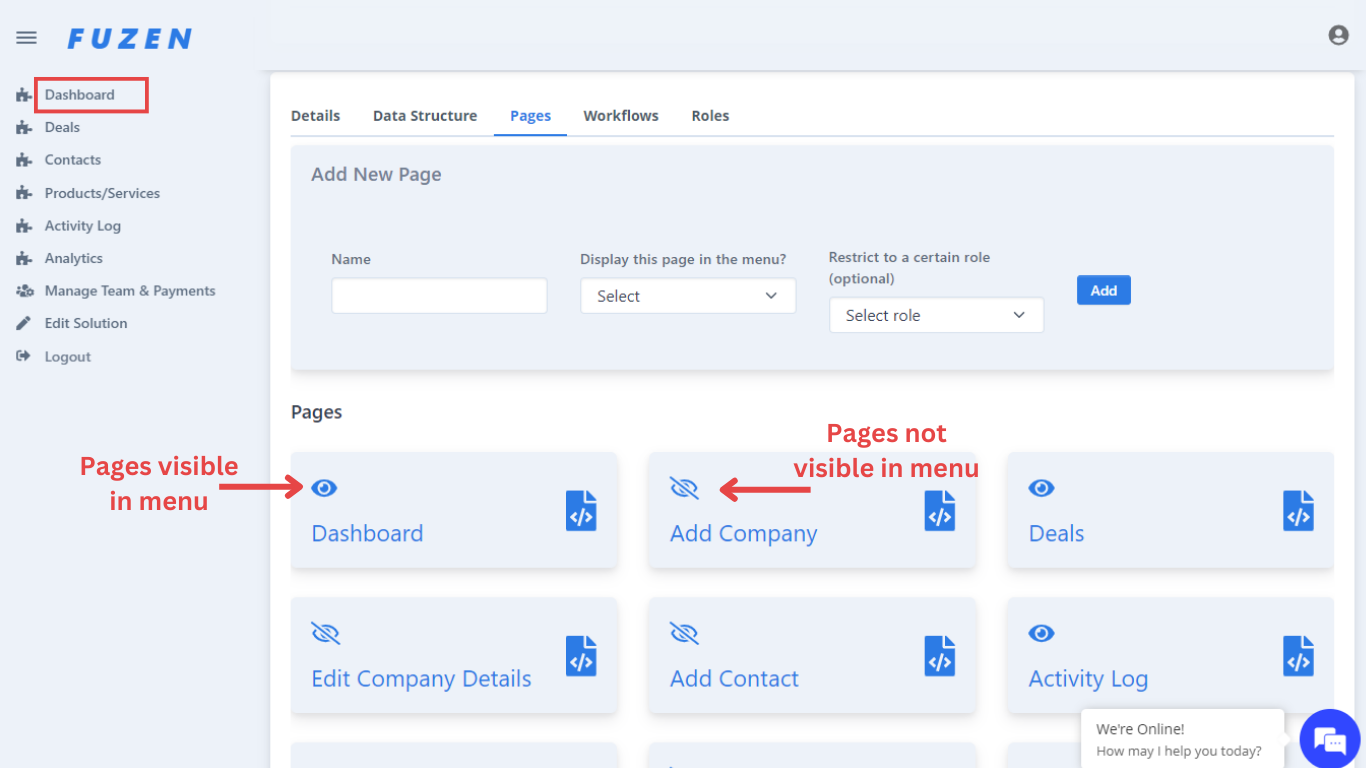
Within the "Edit Solution" page, locate and click on the "Pages" tab.
Viewing Existing Pages
In the "Pages" tab, you will see a list of all the pages currently used in your solution. This section allows you to manage and edit existing pages as well.
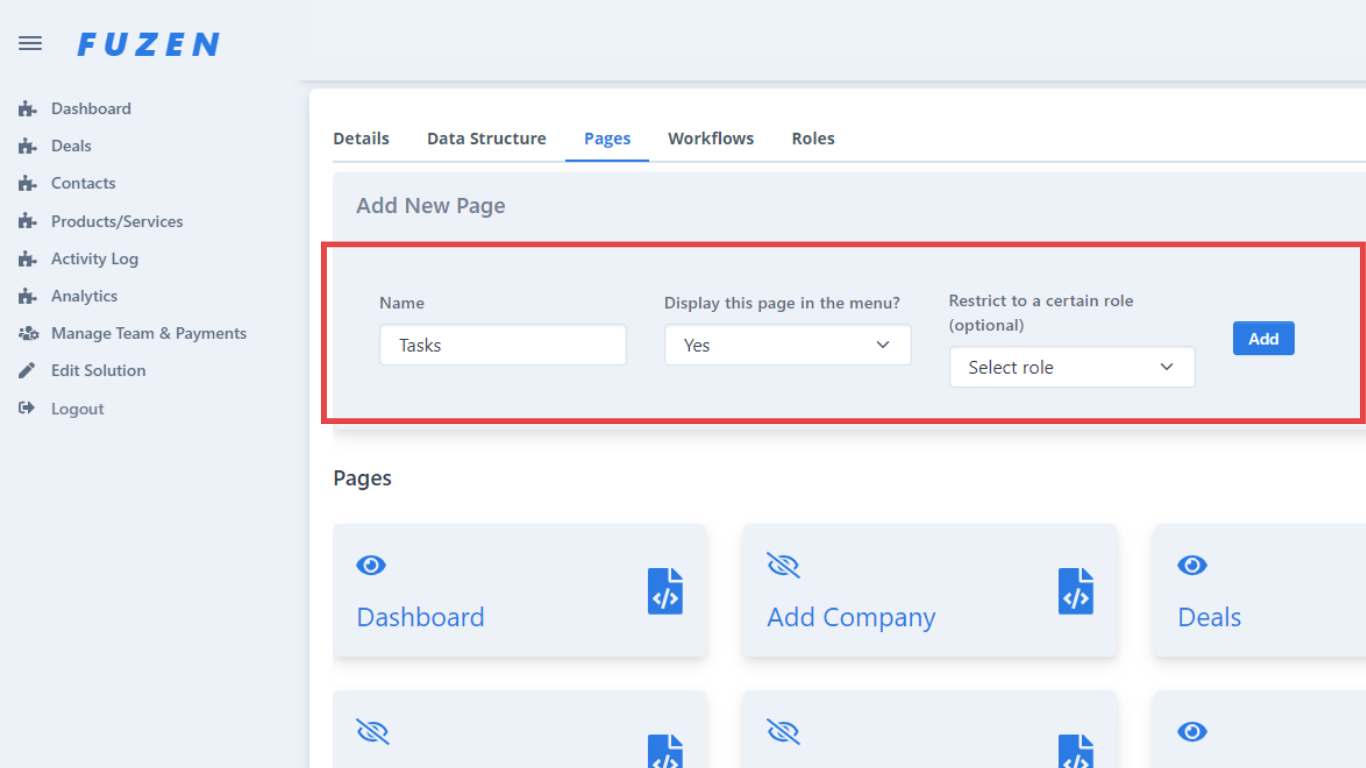
Creating a New Page
To create a new page, fill in all the required fields.
Page Name:
Assign a name to the new page that clearly represents its purpose and content.
Display this page in the menu?
Choose whether you want the new page to be displayed in the menu for easy navigation.
Restrict to a certain role (optional)
Specify which user roles should have access to this page. By default everyone in your team will have access.
After configuring the page to your satisfaction, click on the "Add" button to store your changes.
Your page is now created and is ready to be configured as per your requirements.
Configure your page (Example)
Once you have added the page, you'll have to configure it as per your requirement.
In our example of CRM, you will need a page to add new lead/company/customer.
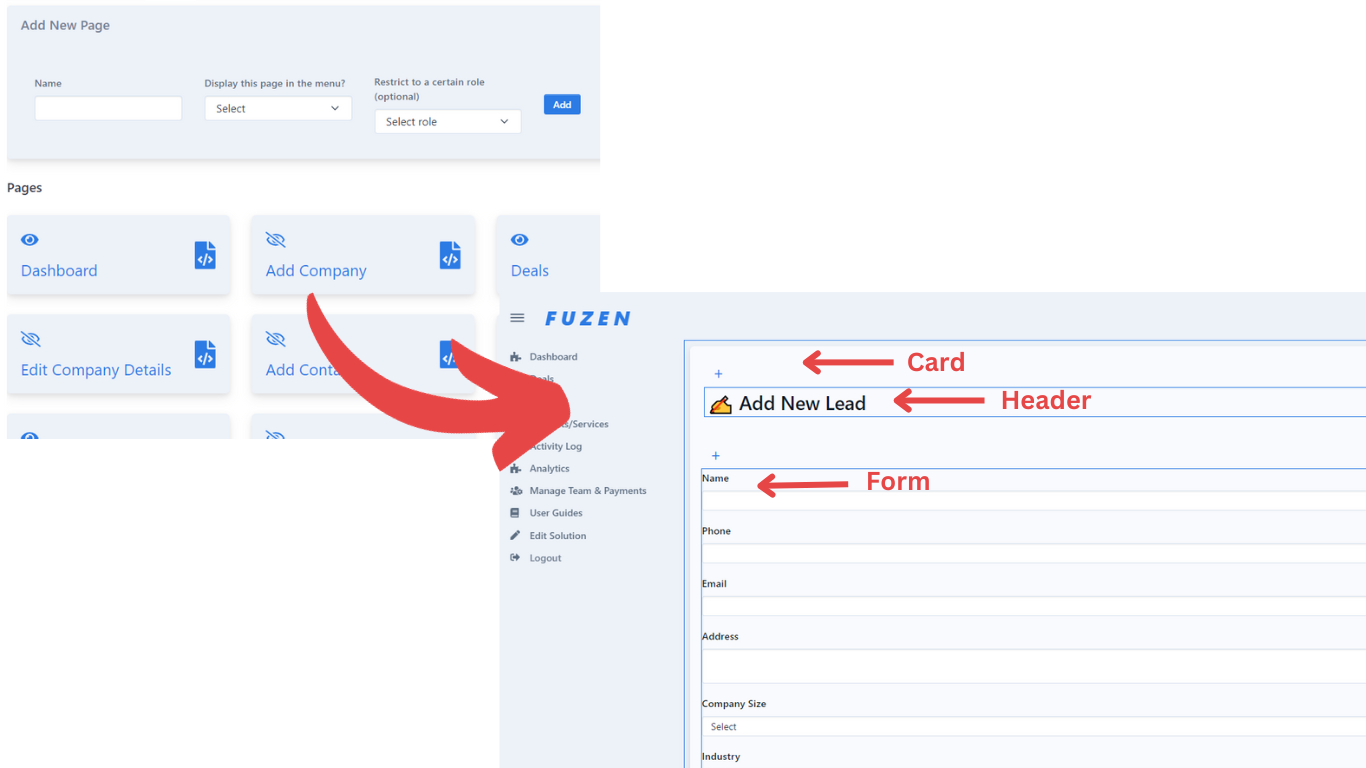
In the page you can add various elements like Form, Table, Button, Header, etc.